Robust Porter Brew Day

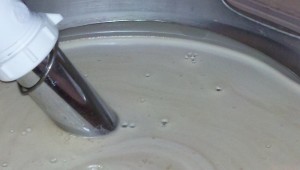
Using a Heat Stick to Help Start the BoilI love the porter style, and this recipe is one my most requested among those who help me consume my brews. After moving, and coming to realize my supply of porter was nearly gone, I decided to re-brew this recipe.

Of course, planning to brew a recipe doesn’t always mean you get to brew that recipe. I’ve been pushing to use up ingredients I have on-hand, and as a result I had to make a few adjustments to the grain bill. Mostly little stuff, hopefully not too noticeable.

A friend helped me brew this batch, and it’s always nice to have someone to talk to while you’re brewing. The process can drag a bit through the mash. Once I’m done with the mash, I usually get pretty busy with cleaning & santizing, monitoring hop additions, getting the wort chiller ready.

Yeast got pitched, beer got fermented cool but it kicked up super active in less than 24 hours. The Fermometer stuck to the side of my fermenter rose from 59 degrees F to 63 degrees F during active fermentation.

Grain Bill

  • 9 kg 2-row pale malt
  • 3 kg Munich II
  • 675 grams chocolate malt
  • 450 grams Crystal 80
  • 454 grams Special B

Hops

  • 112 grams US Goldings 4.5% AA at 60 minutes
  • 56 grams UK Fuggles 4.5% AA at 15 minutes
  • 56 grams US Goldings 4.5%AA at 0 minutes

Yeast

  • 2 packets Danstar Nottingham dry yeast

Single infusion mash, with a target temperature of 153 degrees

Target boil volume: 14.25 gallons

Target original gravity: 1.062

Batch size: 12 gallons into the fermenter

Target final gravity: 1.012 (actual: 1.006)

Unfortunately, I forgot to take an original gravity reading. Based on the previous batch, which had a final gravity of 1.008, I think this will be close to the original version.

What’s the first recipe you developed that you were excited to re-brew?

Brewing in a New Location

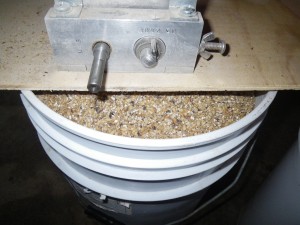
Grain waiting for the mash so it can be turned into wort.Sometimes you just have to ignore what the experts tell you. When you’re brewing, or doing anything you want to improve, you need to control for as many variables as possible. Change only one thing at a time and learn how that affects the outcome.

In the case of brewing, you don’t want to go changing your process and your recipe and your water and your equipment all in one fell swoop. You won’t have any idea which change improved (or screwed up) your brew.

None of my equipment changed, but everything else did. I hope it turns out. Right now, I haven’t been brewing regularly enough to really nail down my process, but over-all I’m happy with how my brew day happened. I got up early and got my grain weighed and ready to crush, then ran some errands and truly started my brew day.

Once I got to the crushing stage, it was just after ten a.m. The beer was in the fermenter by 2:30, but it took just over an hour to clean everything else and get it drying or put away.

You can put off brewing until everything is perfectly arranged and planned and won’t interfere with the rest of your life. And then sometimes, you just have to brew.

Have you done anything “the experts” recommend against? Tell me about it in the comments.

What’s that Flavor?! Bottle-Conditioned vs Force-Carbonated Part 4

I started this article series earlier. Read: Part 1, Part 2 and Part 3

Bottling Day

Here’s where our paths diverge to see if there is a difference in kegging vs bottling. Unfortunately, I forgot to take some pictures of the process.

Andy and I met at his house on a Thursday evening after work. I was dreading the task of bottling because it always seems to take all available time plus, at least an hour. Someday, I’ll post a story about the relational dangers of homebrewing and thinking, “This will only take about an hour.” All I can say is, “Don’t. Just don’t go down that road of thinking.”

Anyway, I got to Andy’s about 6:15 and as I started unloading my bench capper, bottles, bottling bucket, sanitizer, etc(bottling big batches of beer takes a lot of equipment), Andy was running water for a batch of sanitizer. He had his keg prepped and we got everything in place. I carried the beer from his basement upstairs to his kitchen. After placing the fermenter on his serving freezer, we realized the critical error I just made: I placed 110 pounds on top of all the beer available to drink. Oh well, it ain’t moving till we’re done.

We sanitized Andy’s keg and started racking the beer into it. We were a little too frantic on brew day to truly appreciate the benefits of using half-inch siphoning equipment. It goes a lot faster than standard 5/16-inch. I swear, it took about 2 minutes to fill Andy’s keg.

Once we got the keg taken care of, we sanitized our bottles and boiled a batch of priming liquid. We wound up with about six gallons of beer, so we used a little extra DME for priming.

With two of us working, Andy filled the bottles and I capped. I’m not sure exactly how long the bottling took, but it didn’t take nearly as long as I expected. This probably took about a half hour.

Cleanup probably took about twenty minutes. We just rinsed stuff out and I finished my normal cleaning regiment when I got home. I probably spent another 20 minutes making sure all my equipment was cleaned and sanitized before putting it away.

I was expecting the process to take at least 3 hours, since that seems to be about how much time I spend bottling five gallons. 10 gallons usually takes me about 4 hours for cleaning & sanitizing, bottling and clean-up. As I said earlier, I got to Andy’s about 6:15 PM. at 7:45, I was calling my wife to let her know I was on my way home. I even got to tuck my kids in to bed.

If you have friends who like to help drink your homebrew, I highly recommend convincing one of them to help you bottle. It’s not a lot of fun, but it’s much more enjoyable and more efficient with a helper.

Now, we’re just waiting for the bottles and the keg to carbonate. I’ll post an update with our tasting notes when that happens. It might be a few weeks.