Inspiration
I have been homebrewing for almost five years now, and in my first year I heard about oak leaf wine. Members of my homebrew club raved about an oak leaf wine a previous member had made and brought to a club meeting. It was so smooth, and the flavor reminded them of a mild bourbon.
All these voice around me talking about how wonderful this libation was, yet I was unable to find anyone who had made it. And there was no way to get a sample. So I did the only thing a homebrewer could do: I did some research and made some myself.
Information
After spending months searching on the Internet, it seems like this is the most common recipe, from Jake Keller’s web site. I read about eleven different sites, and they all pretty much plaigerised Jack’s recipe, so it must be pretty good. The one deviation I remember called for four pounds of sugar rather than three. That sounds like some pretty good deviation.
Based on my reading, I developed my own recipe with a few goals in mind:
- Oak leaf wine reminded people of bourbon. Therefore, higher alcohol is appropriate.
- I wanted to have more consistent measurements than x number of z citrus fruit.
- I wanted to keep the batch small enough to fit in a five-gallon carboy but larger than one gallon.
- I needed to use oak leaves from our home’s yard.
As a result, I came up with the following recipe
Jake’s Oak Leaf Wine
- 4 gallons tap water
- Approximately 4 gallons of white oak leaves. I wanted to weight them, but the only scale large enough to have a visible screen with a stock pot on it measure in half-pound increments. So there is somewhere between 1.5 and 2.5 pounds of leaves.
- 1 Tablespoon citric acid
- 1 Tablespoon malic acid
- 15 pounds sugar – I bought a ten-pound bag and a five-pound bag.
- 5 campden tablets
- 2 teaspoons yeast nutrient(1/2 teaspoon per gallon)
- 1 sachet Montrachet wine yeast
As an aside, I took pictures of the entire process, but when I tried to download them my digital camera corrupted the files so all I have are pictures of the fermentation.
I picked the oak leaves from a Burr oak tree in our front yard. There were some low-hanging branches that needed to be removed to allow better movement under the tree, so I clipped those and picked the leaves into a 5-gallon stock pot, which I filled approximately to the level of the handle rivets.
After picking, I filled the stock pot with cold water and let the leaves soak for a bit to loosen dirt and bugs. Actually, I needed a break while I ate lunch, so I let the leaves soak. The dirt and bugs just sounds like a good justification. After lunch, I made sure to agitate the leaves well in the water and rub them together as I took them from the water, pulling small amounts at a time(5-10 leaves).
Allowing the leaves to stop dripping, I transferred them to a clean container.
I brought the water to a full, rolling boil and lined the pot with my large strainer bag. I then added the oak leaves and allowed the water to return to a boil. I turned off the heat, pushed the leaves below the surface of the water, and placed a lid on the pot.
I left the pot alone for 24 hours.
I added the sugar to the pot and stirred to dissolve.
I drained the pot into a five-gallon carboy.
[notice]Warning: fifteen pounds of sugar adds almost a gallon of volume, so be careful when selecting your volume. Make sure your vessels are large enough.[/notice]
In a glass measuring cup, I placed 1/2 cup water and added the crushed campden tablets and yeast nutrient. Then heated in a microwave to aid is dissolving. Add the campden/nutrient mixture to the carboy, cover with a cloth towel to allow the mixture to off-gas and let rest for 24 hours.
Fill a sanitized container with approximately 1/2 cup warm water and reconstitute the wine yeast. Allow to proof and begin to foam. After stirring to re-suspend any yeast stuck to the container, I pitched the foamy slurry the wine must.
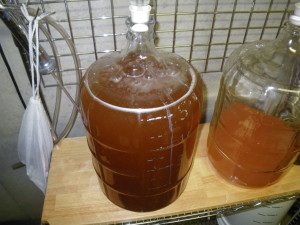
After adding the yeast, it took nearly two days before I noticed pressure on the airlock. I was starting to get a bit nervous, but you can see nice fine co2 bubbles rising in the pictures of the carboy. I’m hoping for the best.
Initial Thoughts
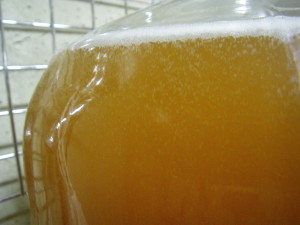
When I first transferred the liquid to the carboy, it was the color of very strong tea, nearly coffee-colored. After pitching the yeast, there was a noticeably lighter portion at the top of the carboy.
As the yeast mixed and began fermenting, particles have dropped to the bottom of the carboy and the color has lightened to the color of iced tea.
I tasted my hydrometer sample and it reminded me of overly-sweetened, weak tea. As the sugar gets fermented out, my hope is that the tannic, subtle flavors are brought to the forefront.
It has been fermenting for two weeks, and the rate of bubbling seems pretty consistent. I’ll be racking it to secondary in mid-September. Maybe I’ll sneak a sample then.
What’s the weirdest thing you’ve ever fermented?


