 Sometimes, you just want things to move more smoothly. On bottling day, I wish there was something I could do to make the process more efficient.
Brewing 12 gallons at a time, and bottle-conditioning, the day I fill bottles is the day that never passes as efficiently as I wish. Based on that frustration, I decided to create pints of priming solution.
I placed 1 and 1/4 cup of dry malt extract(DME) in each pint jar, since that is what I use for priming 5 gallons. I progressed to add enough water to fill the pint jar, shook until it was as dissolved as possible. Then I added water to fill up to a full pint.
After mixing, I placed the pints into my pressure cooker and processed at 15 pounds for 30 minutes.
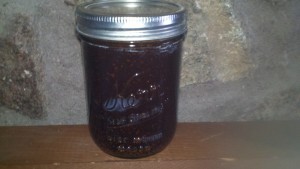
There were several differences in creating the solution that caused some problems, and now I have four pints of over-dark priming solution with chunks in it.
My normal procedure is to dissolve 1 and 1/4 cup DME in two cups of water. Looking back, I realize there was probably one cup of water in this solution. The resulting solution is the consistency of maple syrup, not quite the thickness of liquid malt extract. I had concerns before the processing in the pressure cooker, but thought it would be OK.
The increased temperature from the extra 15 pounds of pressure, increased the darkening reactions to the point where it appears to be stout colored. Dilution will lighten the color, but the clumps of DME prevent me from using it for bottling. Bottle-to-bottle variation would just be too great.
I will probably use these to add gravity during fermentation in stages. Hopefully these extracts will be good for staged additions.
Have you had experiences that don’t turn out as expected? Please comment below and let me know whether you were able to put the surprise(s) to use.


