Ale to the Chief! The White House homebrew Recipes Released

The recipe for White House Honey Ale
One of the first beer recipes brewed in the White House by the kitchen staff

Much excitement greeted the post on WhiteHouse.gov disclosing the White House homebrew recipes for President Obama’s homebrewed beer. Just over a year ago, homebrewers nationwide talked about the fact President Obama had purchased a homebrew kit and actually brewed beer at 1500 Pennsylvania Avenue.

At the time, it seemed like a non-event. Many people buy a homebrewing kit, try it, and that’s it. However, when Obama talked about having some of this homebrew on his campaign bus, there was renewed interest in the fact beer was now being brewed in the White House. What kind of beer was being made? Who was making it? What was the recipe good enough to serve to the President of the United States?

Someone even started a petition to get the White House to these special recipes. Reading the article, you can see a recipe kit was obtained at  a homebrew shop, then beer enthusiasts on the White House staff tweaked the recipe to make it their own.

Mere days after the release of the recipe, I received email notices from at least two different homebrew supply shops with “Exclusive White House Beer Recipe Kits”. Who can blame them for capitalizing on the interest? But calling a recipe published on the most public website “exclusive” is stretching it, even for a marketing department.

What can I say? The recipes look pretty good. You can even purchase one of the “exclusive” kits on Amazon: White House Honey Porter. I’m partial to porters, so I might have to try one of these recipes just to see how it turns out.

I read that while many of our founding fathers brewed beer at their homes, which was common practice, this is the first time beer was brewed at the White House.

Whether you’re an all-grain brewer or brew from malt extract, you should be able to make a reasonable facsimile of these recipes in your homebrewery. Or, if you’re just getting started, these recipes look easy enough to be a good starting point.

Why not get in on the fun? Even the President’s doing it. OK, so he’s not actually the one brewing, the kitchen staff are doing the actual brewing, but why not shoot for a drink worthy of the leader of the free world? Pick up an equipment kit and a White House Honey Porter Kit  and start brewing beer to lead the world!

The Recipe for Obama's Honey Porter

Protect Your Beer!

The Danger

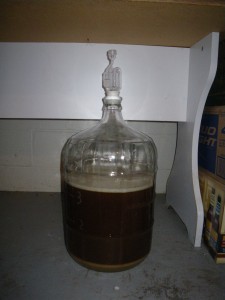
Beer in a clear carboyOne of the dangers facing your beer as it ferments is the possibility of being “light struck”. This happens when the energy from light rays interacts with hop compounds in your beer to produce off flavors. If you use an opaque fermenter, this is not a danger to you. However, if you use clear glass or plastic containers, you need to protect your brew to keep it tasty.

You can purchase a Carboy Cover to protect your fermenting beer. But, personally, I don’t see a reason to spend $15-$30 for a commercially-produced gadget you can easily create from something you probably have crumpled in the bottom of your linen closet.

All you need to do is find one of your old pillowcases that have slowly worked their way to the bottom of the pile of useful items in your linen closet.

Take your pillowcase and slip it over the top of your carboy to make sure it is large enough to cover it without getting stuck. Lay the pillowcase on a flat surface so you can find the middle of the sewed end of the case.

Pillowcase with carboy holeOnce you have found the middle of the sewed end, you should cut a circle or oval approximately three inches across to allow the neck of your carboy to stick through the pillowcase.

Since you know the pillowcase fits over the top of your carboy, now you need to make sure the hole is large enough to accommodate the neck of your fermenter. Slip the case completely over the carboy to determine if you need to re-size the hole. It is better to start with a hole that is too small and enlarge it than cutting the hole too large, causing the cover to expose the top of your carboy to light.

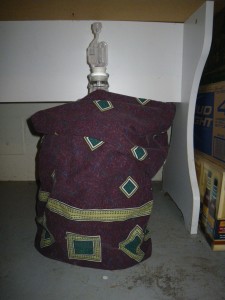
The next time you are fermenting a batch of beer, now you can slip your new cover over your batch of beer to protect it from light. I usually put the cover on after I have attached the airlock, but if you are using a blow-off tube you will want to place the cover on first.

Beer safe and cozy under my homemade carboy cover

Make a Yeast Starter . . . You Drink

The Motivation

One of the challenges of making large batches of beer is making sure you have enough yeast to get a healthy fermentation going. According to the yeast pitching rate on MrMalty, I will require 4-8 yeast packs to make sure I have enough yeast for a ten gallon batch. Why not make a yeast starter you can drink?

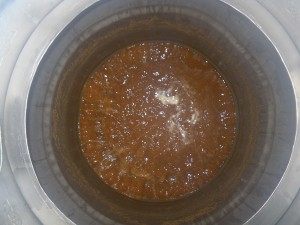
A nice rolling boil going.I decided I want to make a large batch of California Common, so I knew I wouldn’t be able to just pitch the vial of WLP810 into ten gallons of wort. Mr Malty said I would need a 7-liter starter, which is just under two gallons. So I decided to make a small batch of beer to use as the starter. This way, at least the starter can be enjoyed rather than just decanted down the drain.

Looking at my pile of ingredients, I figured I could shoot for a 3.5-gallon batch of a low-gravity beer using the brew-in-a-bag technique. This recipe did not come from a book or web site, so I have no idea how it will turn out. I just had some ingredients I wanted to use.

Grist

  • 6 pounds Vienna malt
  • 1 pound Munich malt
  • 8 ounces Special B

Hops

  • 1 ounce Glacier, 5.4% AA  at 60 minutes
  • 1 ounce Glacier, 5.4% AA  at 10 minutes

I heated 4.2 gallons of water to 162 degrees Fahrenheit, then added my grain into the bag and stirred to break up any clumps and get a nice even consistency. The temperature dropped to 154 degrees. I put the lid on my kettle and let it sit for fifty minutes.

After about 40 minutes, I drew up 1.8 gallons of water and heated it to 180 degrees for mash out. At 50 minutes, I took the grain bag out of the kettle. The temperature had dropped to 151 degrees.

Placing the grain into the 1.8 gallons of water and stirring it up again, I let it sit while I got the burner going under the main water. After about 5 minutes, I lifted the grain out of the smaller pot, let it drain and added the wort into the main kettle.

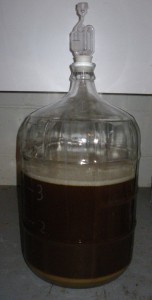
3.5 gallon starterI boiled and chilled normally, racked into a five gallon carboy, pitched the yeast and shook it up. Then I placed the carboy on the floor in my basement so the temperature would stay slightly cooler than the air temperature of my basement.

I understand the purpose of a yeast starter is to get a strong colony of yeast ready to ferment your beer, but why not let it server more than one purpose? If you have the time to make a batch of beer for your starter, you can get a little beer and some healthy yeast. Sounds like a good deal to me.